Have you wondered what the term ‘line and wash’ means? I suppose it says it right there in the phrase but it took me a while to really understand what the term referred to, much less how utilise this sketching technique.
Turns out I have pretty much always been using a line and wash method, picked up from watching the work of other urban sketchers. Now, however, I know what it means, I know there are different approaches to take and exercises to develop skill.
So that’s exactly the knowledge I am going to share with you in the post below.
But first…..
Check out my ebooks with hundreds of ink & watercolour travel sketches from all over the world. Get some inspiration for your next trip…

What does line and wash mean?
A sketch in line and wash (also sometimes referred to ‘pen and wash’ or ‘ink and wash’) means that both linework and watercolour are used together in the sketch or artwork.
I think this would probably describe 99% of my work. When I think of ‘line and wash’ though, I tend to think of the work of someone like Simone Ridyard, where most of her work is sketched with ink lines and she throws in splashes of watercolour accents.
However, line and wash can also mean mainly using watercolour with just a few lines of ink as accents here and there. Thinking of it this way round, I am reminded of some works by Alex Hillkurtz.
I recently took Alex’s ‘Architectural Sketching With Watercolor and Ink’ course on Domestika.org which I can highly recommend. He talks about how he keeps his linework with a fountain pen minimal and lets the watercolour do most of the work.
If you are looking to take an online course on urban sketching or watercolour painting be sure to check out my thoughts on the course I have taken so far in the following posts:
Why use line and wash technique?
Many urban sketchers use the line and wash technique to capture the world around them. The use of line and wash is a favourite for various reasons:
- Efficient – if you run out of time and only get a line drawing done, it can stand on its own or you can add colour at a later date, especially if you took a reference photo of the scene
- Expressive – this method helps to develop a loose expressive style over time
- Flexible – allows you to use 2 different mediums together: ink and watercolour
- Variation – switch between ‘line first’ and ‘paint first’ approaches (explained in further detail below) to achieve different effects
- Contrast – Linework provides structure whereas the paint can be applied lightly and loosely to indicate atmosphere
- Quick – you can capture a scene with speed using either of the approaches to line and wash
- Convenient – using a pen and some watercolours to sketch is super convenient as both mediums are very portable and perfect for sketching on the move
- Aesthetics – I think line and wash is a beautiful approach to sketching
Examples of line and wash
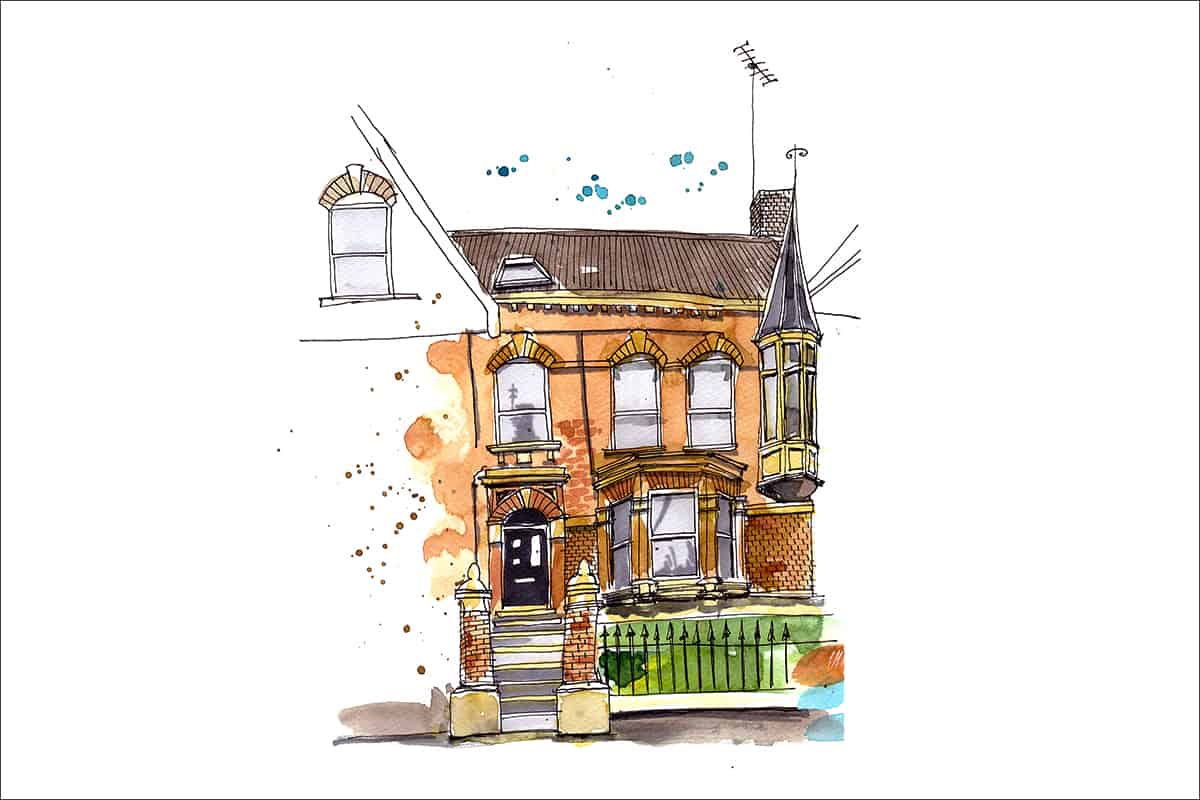
Below are some examples of how artists use a line and wash technique, some couple this with only selectively colouring parts of their sketch which I find a particularly beautiful technique. It’s surprisingly tricky to only add paint to parts of the sketch – and know which part to add it too!
This way my first attempt at trying to use selective colour:
As you can see I still painted most of it! I’ll keep working on it.
Graham Reynard
I cam across Graham’s work on Instagram and I absolutely love the way he captures a scene with simple lines and accents of watercolour.
Neil Whitehead
Neil is another artist I discovered and love following on Instagram. He just has such an exceptionally loose beautiful style that feels effortless, which is exactly what I think of when I hear the term ‘loose’.
Liz Ackerley
I’m a big fan of Liz’s work and I talk about her paint first approach in more detail below but this Instagram post capture the essence of her process succinctly.
Simone Ridyard
Anyone who has read more than a few posts on this blog will know I’m a big fan of Simone’s work and I love her book Archisketcher too (which you can find on Amazon). She is a master at line sketches accented with light washes or splashes of watercolour. She also has an amazing way of overlapping her lines too, just sketching on top of other things. It’s just so free but works incredibly well.
How to approach line and wash
As mentioned earlier there are two main approaches to a ‘line and wash’ sketch.
- Lines First – Sketch predominantly with pen lines, creating a structured and tonal sketch in which you can add washes of colour to afterwards.
- Paint First – Create your sketch with watercolour first, adding values and depth with the paint and use linework on top sparingly to add some emphasis in key areas.
Line First Approach
The idea here is sketch first and predominantly in pen (or whatever you want to make your lines with).
You could use a basic a pencil sketch before using pen and ink. I tend do this to draw the big shapes, making sure I get the proportions roughly correct and can fit the sketch on the page.
I then carry on to sketch the details in pen using the pencil sketch as a framework. Try to use your pen loosely with free-flowing lines. Don’t worry if they are not quite straight. I always think this adds a bit of drama to the sketch.
I’m told that all of my sketches slightly lean one way, so that may just be a quirk of my sketching and I’m fine with that. Hyperrealism is never my aim. To capture something on paper the way I interpret it is my goal.
In the video below by Peter Sheeler you can see he doesn’t even try to draw straight lines, he deliberately puts kinks in them. I think this is a clever approach.
When you are drawing an edge of a wall, for example, it’s not perfectly flat or smooth. Walls consist of bricks or rough textures. So, in fact, a perfectly straight smooth line would not convey the texture of the wall.
You’ll notice Peter starts sketching straight away in pen. Don’t worry if you cannot or do not want to do this, use a pencil lightly to get your basic shapes in.
When I first started I used to sketch out most of my drawing lightly in pencil before using ink. Don’t be afraid to do this if you need to. Over time you will gain more confidence the more sketches you do and you will rely less and less on pencil sketches and become more confident with your linework in ink.
Once you have completed your line sketch in ink you can add value and depth with the pen too. You can use hatching and cross-hatching techniques in certain areas to add some mid-tones or shadows. This is up to you though and not necessary, you could add depth with watercolour in the next stage if you want to.
If you want to brush up on how to use hatching and cross-hatching effectively, check out the video below from Alphonso Dunn.
Alphonso is a great teacher and offers so much high-quality content for free on his Youtube channel so if you haven’t checked out his channel yet, certainly dig in. He even has a whole series sponsored by Strathmore on urban sketching.
When you have completed your line sketch and added value and depth (if you have chosen too), move to watercolour to add some colour. If you have added value and shading already with a pen then you will only really need to use simple flat washes of watercolour in this stage to finish your sketch off.
Just remember not to be too tight in your use of watercolour, do not arduously try to stay within the lines of your pen sketch otherwise it will look like you have coloured a colouring book page.
Do you want to learn how to sketch your own adventures in ink & watercolour?
GET 50% OFF FOR A LIMITED TIME ONLY!!
I will show you my exact sketching process in ink and watercolour. I have travelled around the world in the last 3 years and this is my go-to system of creating beautiful yet quirky illustrations to capture the magic of my discoveries.
We will work through 3 projects, step by step (pictured below), all of which are real-life examples of things I have sketched along my travels. I provide the photo references you can work from.
We will start by choosing a composition, laying in the initial pencil sketch, adding ink lines, layering watercolour and adding the final touches.
This and much more are included in my course, Sketch Your Adventures, click the button under the image to find out more!

Be loose and expressive. I find adding a few splatters of watercolour in some chosen areas always helps make a sketch look nice and loose too.
Or you could take the approach of some of the artists I mentioned above and only use watercolour in a selective way, painting only portions of the pen sketch and leaving other parts unpainted.
Paint First Approach
Although it’s not the approach that seems intuitive to me I absolutely love experimenting with the paint first approach. It really helps me loosen up just by the nature of using watercolour and knowing that later on I will come and tighten things up just a little (or sometimes a lot) with some lines.
I’m a big fan of Liz Ackerley’s work and she very much utilises the paint first approach, in fact, she has some super interesting Youtube videos outlining her approach which I encourage you to check out. The video below takes you step by step through her particular process:
I love the way she splatters on the paint and lets it drip down the page. You can see she has a plan even though it may look like she is just mindlessly throwing paint down on the page.
Notice how she shapes her paint strokes to follow the curvature of the road. This certainly comes into effect later on in her painting. It’s a minor thing to notice but after experimenting with this technique a little myself I can see how using the brush strokes this way bring things together in the end.
My sketch below was one of my first attempts at using a paint first approach after (a) watching Liz’s video about this technique and (b) watching this Skillshare course by James Richards regarding adding people to your urban sketches. I decided to try out both techniques in one sketch, I think it worked.
Line and Wash Demonstration – Paint First (but also kind of last too)!
In the video below I played with line and wash techniques, applying paint first in the trees, then using ink for the house structure and over the top of the trees. I then back in with paint to create the shadows on the house, then back to pen to thicken some lines to help create a sense of depth. This is all to say that there is no rules, or right way to do something. You can move back and forth between the different mediums as many times as you feel like.
Another technique I have enjoyed playing with is one I saw in a video by Teoh Yi Chie (and something he learned from fellow urban sketcher Tia Boon Sim).
Thie idea is to paint your sketchbook page randomly, creating a background of watercolour and then draw on top once dry.
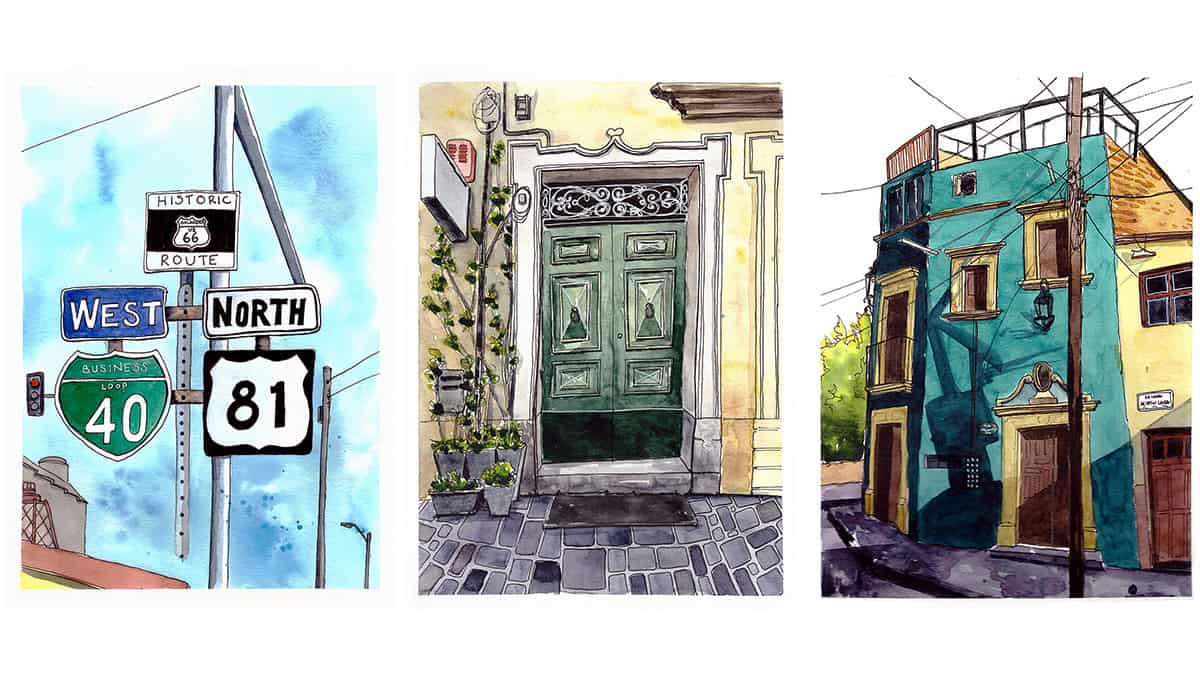
I really enjoyed trying this out in the below 3 sketches, although once I had finished the line drawing I did go in and add some further depth either with grey markers or just adding a bit more watercolour to emphasis certain areas. This is a really fun exercise and can really help to loosen up your sketching.
Final Thoughts
I really hope this post has helped you understand what line and wash refers to. For some reason, I had a mental blank with this concept for a long time – even though it is actually what I have been doing.
It just shows you don’t always necessarily need to know what you are doing in terms of being able to explain it someone else. You can learn from what others do and by sketching in your own intuitive way without having to label things or conceptualise them.
I hope some of the techniques and exercises I have drawn (shameless pun-time) your attention to above inspire you to want to play around with your sketches and try some different approaches.
Remember to enjoy the process of creating art in your sketchbook. Play and experiment, sometimes it may be a mess, other times you may get some happy accidents. Remember these sketches are not to hang on the wall, they are for you to have fun, work stuff out and expend your creative energies!
If you want to keep in touch, definitely join my newsletter below. I email twice a month with some interesting urban sketching projects, behind the scenes information and exciting announcements…and perhaps even a special offer too from time to time.
Some of my favourite online classes
- Acrylic Painting Step by Step: Create Incredible Landscapes – Maru Godas
- Expressive Architectural Sketching with Colored Markers – Albert Kiefer
- Experimental Watercolour Techniques For Beginners – Ana Santos
- Urban Sketching: Express Your World in a New Perspective – Lapin


Comments are closed.