
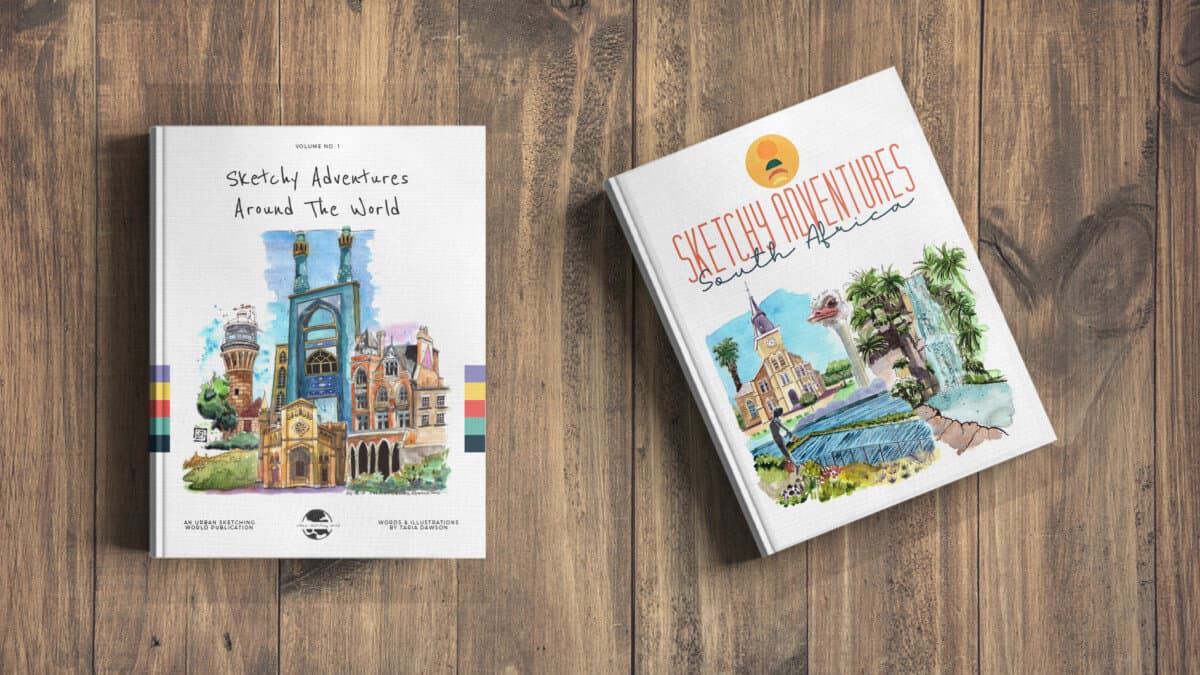
As of August 2020 I have released my very own illustrated book out into the world: Sketchy Adventures Around The World Volume 1.
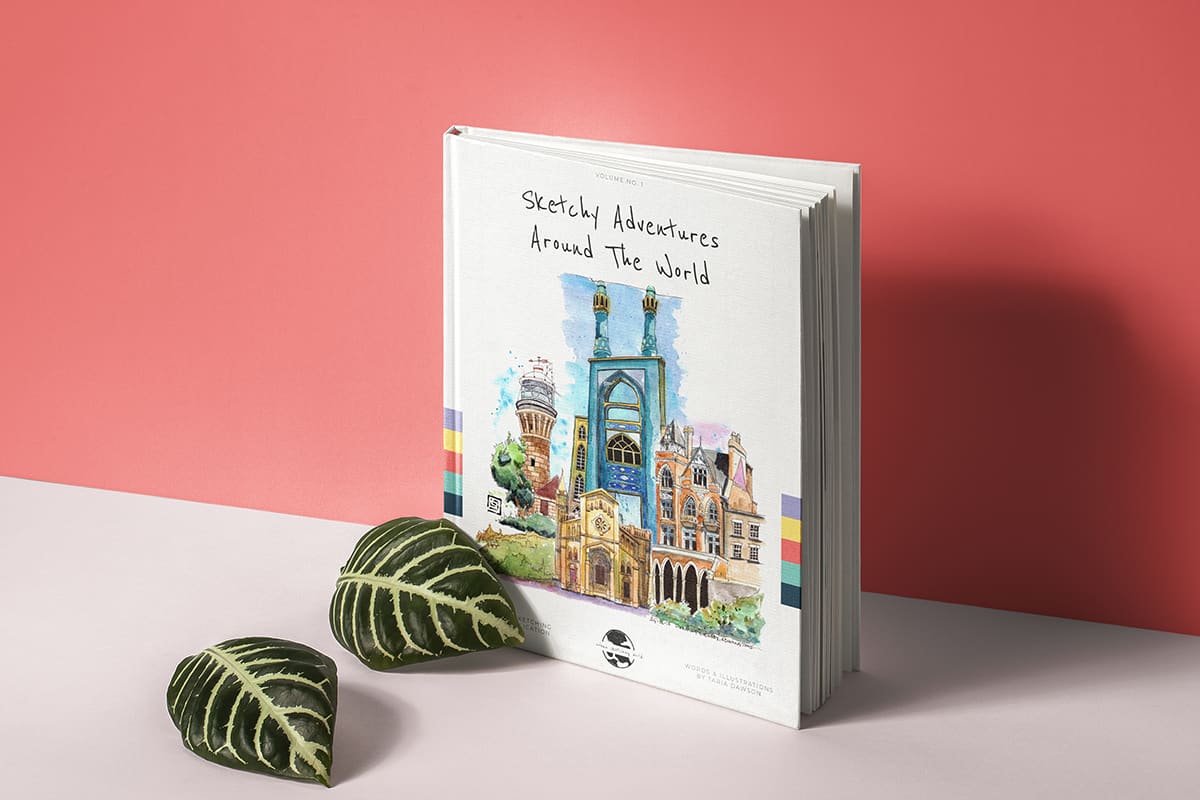
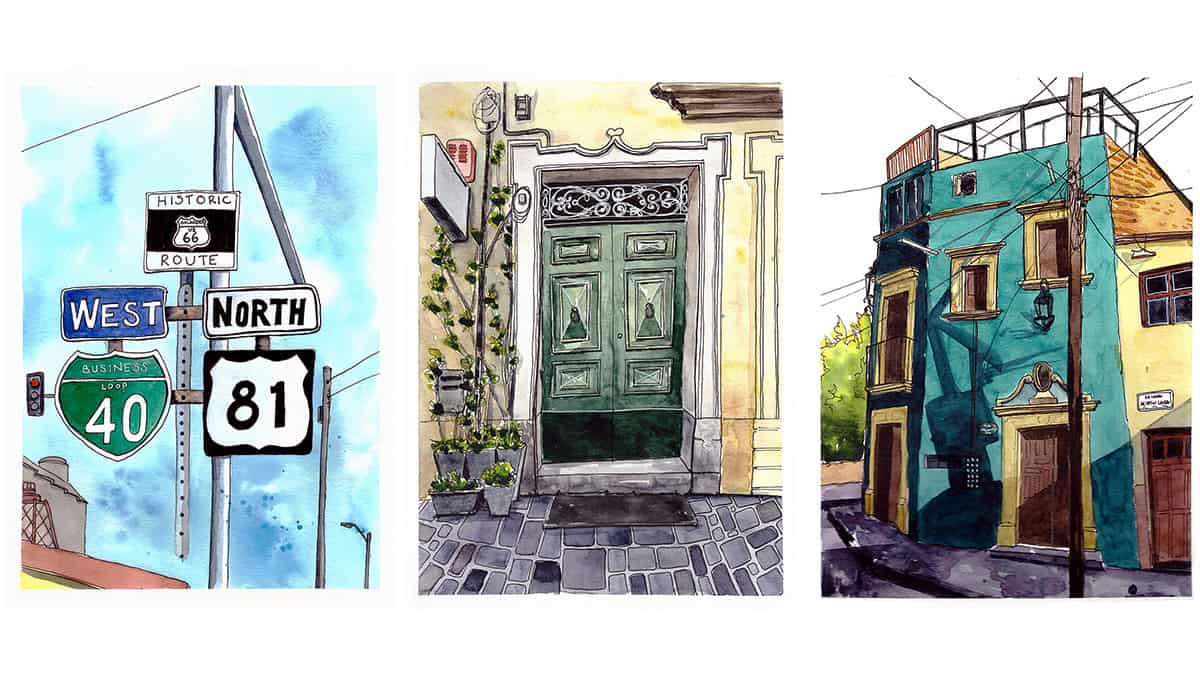
This book is a collection of my ink and watercolour illustrations from the last 3 years of my travels around the world. There are over 130 illustrations from 15 countries across 4 different continents contained within this 60 page PDF.
It took me a number of months to put the book together. Luckily I had many aspects ready (such as hi-resolution scans of my illustrations already edited) and some notes from various trips I could edit down and add in. I also have previous experience using Adobe software and a reasonable grasp on graphic design principles. Oh, and I had the time too. Because, Covid.
All of these things meant that what could have taken 6 months or even a year to put together took me about 2 months.
It’s quite hard to find any specific information on putting a book like this together. Whenever I searched for information on how to make an illustrated ebook, all of the results were related to children’s books and formatting them for Kindle or e-readers. It wasn’t quite the guidance I was looking for.
So, I figured it out myself and I decided there may be some other people out there who could do with a bit of guidance too. For those of you out there who have a body of work and are keen to put your own ebook together then I really hope this post can help you.
While I cannot go into step by step details of how to use either Photoshop or InDesign, I will do my best to explain the overall process so that you can delver further into using these programmes if you wish.
I am going to focus on the book becoming an ebook, and more specifically a PDF ebook. However, if you wish to print your book I would encourage you to speak to a printer first who offers these services to find out what the requirements are in terms of size, number of pages etc so that you can set your book up correctly from the start.
I have been toying with the idea of making this book into a Kindle format in order to sell via Amazon. I’m not quite sure if this will work or give me any decent kind of profit margin. This is the main reason I decided on the route of making this book a PDF and selling it directly myself.
Before we move on, let me just say, this is my process and what made sense to me. Generally there are many ways to skin a cat…so you may you have a better way to do things, and that’s fine…although, if you do, please let me know too!
Tools & Materials Required
In order to turn your sketches into an ebook you will need the following:
- computer
- scanner
- Adobe Photoshop (or similar)
- Adobe InDesign (or similar)
If you do not have Photoshop or Indesign you can get a free trial for 30 days. I would recommend getting Photoshop first so you can scan and edit your sketches. Then once you have finished with that you don’t really need it anymore and you can then start the 30-day trial with InDesign to start laying out your book. It will be tight but at least you will have a deadline to work towards!
After the free trial, the software is a month by month subscription so you could just pay for another month and then cancel. For more information on the Adobe Creative Cloud, visit their site here.
However, there are decent alternatives to both Photoshop and InDesign which do not involve having to pay a monthly fee.
For my list of Photoshop alternatives, check out this post.
For my list of InDesign alternatives, keep reading.
Scan Your Artwork
Firstly, you will need to scan all of your sketches into your computer. It is possible to take photos of your sketches instead of using a scanner, however, it is far more difficult to get a decent end result this way, even after editing in Photoshop, so I would highly recommend using a scanner. Most scanners will have some options where you can choose the resolution you wish to scan at. You should scan your work in at a minimum of 300 dpi.
I also highly recommend scanning your image in as a TIFF format (rather than a JPG or anything else). This is because the image does not get compressed and you have more flexibility to edit the scan in Photoshop without losing any quality. Once you have edited the image in Photoshop, then you can save it as a jpg file but more on that later).
For more information on scanning your artwork and editing it in Photoshop, you can check out this post.
Edit Your Artwork
Once you have all of your sketches scanned in, you should go and edit them in Photoshop. To sign up for a free trial of Photoshop visit the Adobe site here.
I shall refer you to my post on how to do this as it is a bit too much to repeat in this post. If you prefer watching the instructions, then check out my video below.
Don’t go too crazy with editing in Photoshop. You just want to make subtle adjustments. The main thing is to make sure the background of your image is white to match with a white page (if that’s the look you’re going for) and boost the colours/contrast just a tiny bit to make it pop but not so much that it looks too contrasted and over-edited. There is definitely a balance to be had. Just use your best judgement as to what looks good.
Layout Your Book
Ok, now we get into the meat of laying out your book.
Before we head down a technical rabbit hole of Adobe InDesign, you need to have an overall plan.
Does your book have an overall theme?
For instance, the theme of my book ‘Sketchy Adventures Around The World‘ is travel. The book contains my sketches of the last 3 years of my travels.
Are your sketches of a particular place, or set of places? Are the sketches mainly of people you have met, or grand architecture? Or perhaps your sketches are just your best from the last few years of your life…that’s still a theme.
It’s good to be clear on this from the start as it will help you achieve a cohesive project by the end and will also help you with the next step.
Do you want to learn how to sketch your own adventures in ink & watercolour?
GET 50% OFF FOR A LIMITED TIME ONLY!!
I will show you my exact sketching process in ink and watercolour. I have travelled around the world in the last 3 years and this is my go-to system of creating beautiful yet quirky illustrations to capture the magic of my discoveries.
We will work through 3 projects, step by step (pictured below), all of which are real-life examples of things I have sketched along my travels. I provide the photo references you can work from.
We will start by choosing a composition, laying in the initial pencil sketch, adding ink lines, layering watercolour and adding the final touches.
This and much more are included in my course, Sketch Your Adventures, click the button under the image to find out more!
Map out chapters or sections
On a piece of paper, map out the different sections of your book. It could be my time, by place, by sub-theme. For example, here is my chapter map for Sketchy Adventures Around The World:
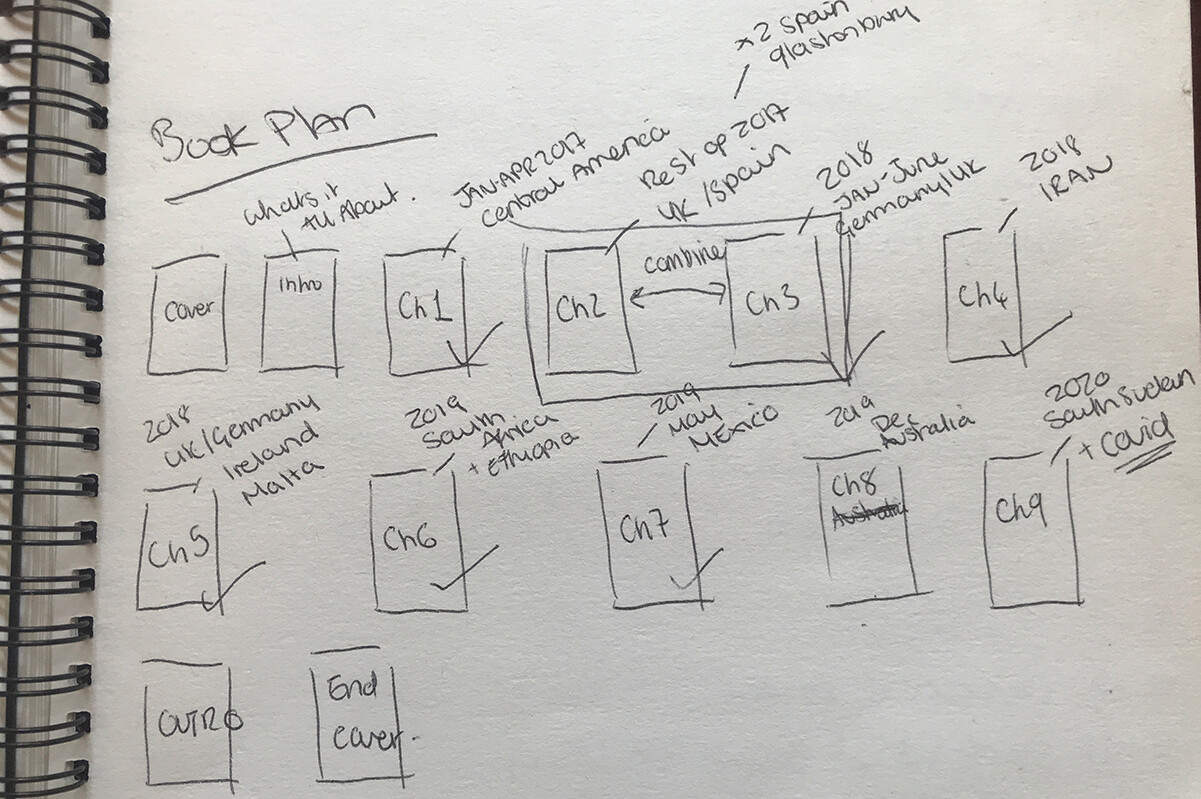
I adjusted these chapters slightly as I went when for instance I realised I did not have enough content for one chapter and ended up merging two. Have the map next to you as you work.
Now we are ready to move to the computer. Launch your desktop publishing software of choice. I use Adobe InDesign purely because I already have it and I already know how to use it. As mentioned above, there are alternatives to InDesign out there which may be more affordable or convenient than having to pay a monthly subscription so do have a look around. Most pieces of software involve a bit of a learning curve so once you have chosen something, you will probably stick to it for any future projects too. If you do want to use InDesign (which is basically the industry standard) then check out their offer here.
Alternatives to Adobe InDesign
I have not used any of the below pieces of software, however, after much research they seem to the top picks:
- Affinity Publisher, available for Windows & Mac, one-off payment
- Quark Xpress, available for Windows & Mac, one-off payment
- Xara Page & Layout Designer, available for Windows only, one-off payment
- Scribus, available for Windows, Mac & Linux, free!
- Swift Publisher, available for Mac only, one-off payment
As mentioned I have not used any of the software above however, there is a lot of information online and tutorials on Youtube so once you have decided on one that suits your budget and technical level, then invest a bit of time in getting to know how it works.
Size of your book
This is where I initially went a bit wrong. I ended up inadvertently sizing my book pages too small. After I had exported a PDF to preview the document I realised my error. I had to go back set a larger size and reset all of the text and images I had laid out! This was not fun. Learn from my mistake and set your document at the right size to begin with.
What is the ‘right size’?
The first thing to remember is that we are designing an e-book. Therefore most recommendations will be dependent on the size of the device you are targeting. As we are focussing on a PDF here (and not a written book for an e-reader) then a good size to aim for is a mid-size tablet.
Within Adobe InDesign, there are settings to choose specific types of devices such as a 10.2 inch iPad or a certain model of phone etc. These are useful if you are designing an app for example and you want to design for many different screen sizes.
Our PDF ebook can be resized nicely for most screens so this is why picking an average-sized tablet screen will do fine. My book was designed at the size: 1668 x 2224 pixels. I have tested my PDF book on several phones, a Samsung tablet, a MacBook 12 inch and a Macbook Pro 15 inch and it looks perfectly fine across all of them.
Your software may have some presets for document sizes but if you are looking for at least an indication of what works then I hope that information helps!
Make sure your document is laid out on individual pages and not with facing pages (where you can see 2 pages adjoined in the middle like a traditional book). Your PDF will be scrolled with one page beneath the next so make sure you also lay it out in this fashion.
Front Cover, Contents & Introduction
Leave the first page for your front cover. You can use one of your sketches on the front cover or you could draw something specifically, add a title and your name of course.
I then chose to include a contents page, followed by an introduction page explaining a little about me and my background, how the book came about and why it was important to me.
I always knew I wanted to create the book in order to sell it to the public. If you are making a book just for you, or to share freely with friends and family (or even the world) then perhaps you may make slightly different decisions. I think an introduction page to explain a little about the project is essential if you want to put your work out into the world.
Main text
As well as placing my sketches, I knew I wanted to include a few notes alongside some of them. You may decide you do not want to include any text, that’s fine but if you do, read on.
Decide on a font to use for your book and use it consistently. I chose a font that looks like handwriting as I wanted to give the book the feel of it being a sketchbook or journal. I used a clean bold font for the headings and any other text that wasn’t next to my sketches.
If you are going to use two different fonts, you want to balance them. If you have one overly decorative or script-like font (like the handwritten font I used) then your second font should be simple and clean to help balance this. If you have two fonts that are decorative or flamboyant they will clash and it will look messy. If you use two simple clean fonts together, it can look confusing, like you accidentally used the wrong font in places.
Colours
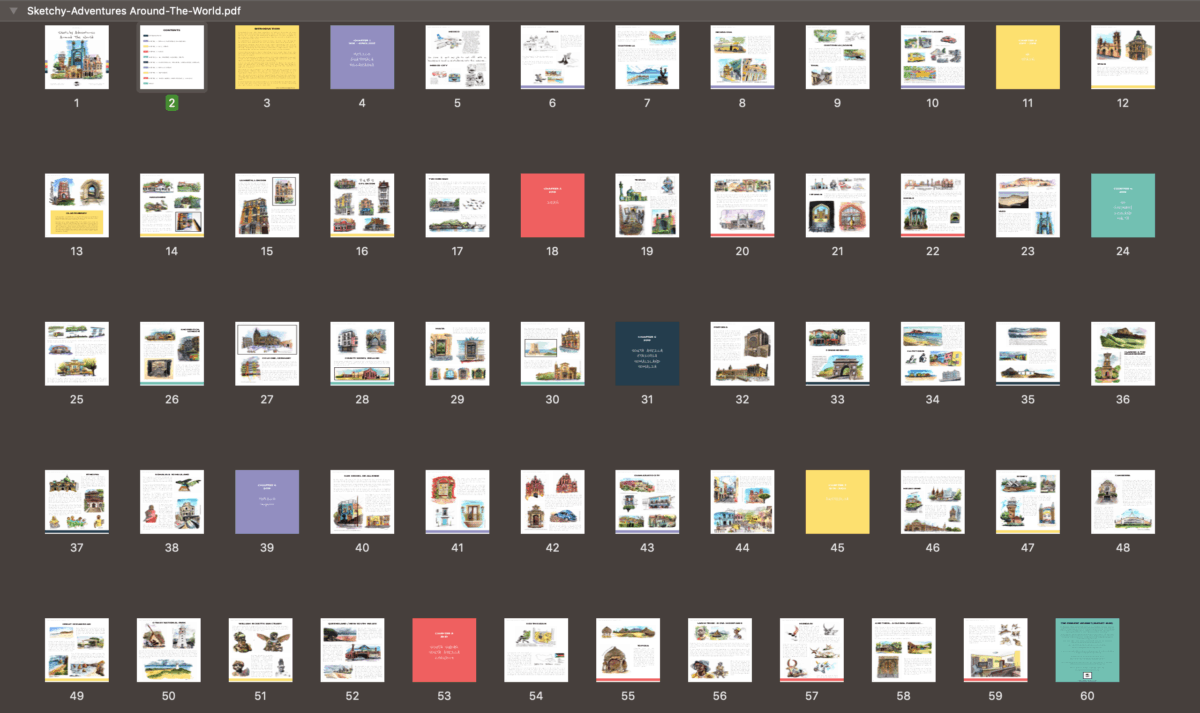
You may wish to use some accent colours here and there in your book, perhaps for text boxes, headings or other design elements. For example, each of my chapters is colour-coded, and that colour is referenced in the contents page and with a strip at the bottom of every other page within the chapter. Is it necessary? No. But does it add a bit of design and make it look a little more polished? I think so.
I picked 5 accent colours for my book and used them in a consistent and systematic way throughout the book. Here is a screenshot of the overall book – I hope you can see what I mean in regards to the colours:
How do you choose a colour palette?
Luckily, there are many quick and easy ways to come up with a beautiful and cohesive-looking colour palette. It’s quite fun too. There are many websites that generate colour palettes but my favourite is Coolors. You can explore trending palettes or make your own. Once you have decided on your palette, you can export it, or as I do, just take a screenshot and then those are your colours – stick to them!
Composition
When you are laying out your book, it’s important to have an eye on your composition, much like you would if you were sketching something. InDesign (and I would imagine its alternatives) will allow you to have guidelines on your page so that you can ensure things are lined up where they should be. I had a grid system laid out on my page in order to make sure things were balanced. If you are interested in making pleasing layouts I would recommend looking up some Youtube videos on the basics of graphic design. This will help you create a great-looking layout.
Some of my favourite online classes
- Sketching People with Watercolour – Marcus Penna
- Watercolor Portrait Sketchbook – Carlos Rodriguez Casado
- Pictorial Sketchbook with Gouache – Maru Godas
- Urban Sketching: Express Your World in a New Perspective – Lapin
Preview & edits
Once your book is laid out (which I promise will definitely take some time, especially if you are new to InDesign or your desktop publishing software of choice) you are ready to export the document as a PDF in order to preview it on a tablet, phone or computer or all of these.
This is when you want to check everything is legible and looks right in terms of size and clarity. Arguably you could actually do this stage a lot earlier, perhaps after you have laid out 6 pages or so. This would help you avoid my mistake of having the whole book in the wrong size document!
This is also the opportunity to survey the whole book, check it flows nicely and look for spelling, grammar or just general layout issues. I sent the book to my boyfriend and best friend to have a look through to in order to get their feedback and suggested edits.
Once you have been through the revision process a few times (I think it was about 5 times for me as I kept spotting errors each time I thought I was done!) you can export the final document…and then do with it as you will!
Selling your ebook
In case you are interested in selling your ebook, I thought I would just add a few of my experiences here which I hope may be useful to you.
Once I had finalised my book I started to look at how I could sell it. I knew I did not want to go down the route of turning it into a Kindle book to sell on Amazon. The idea just did not appeal to me. However, if this is what you want to do then you need to format your book in a certain size and in a certain way. Do not follow this tutorial! Find a Kindle-specific tutorial. I looked briefly and it all seemed to confuse me a bit so I have backed away…for now. If I figure it all out in future then I shall let you know!
I was far more keen on the idea of just having a PDF format book that I could sell directly myself, via social media, Youtube and here on my website.
Check out my ebooks with hundreds of ink & watercolour travel sketches from all over the world. Get some inspiration for your next trip…
I am yet to add my book to my Etsy store, however, I do have plans to. I do not think this is going to be a massive source of sales as the platform is very saturated but I have a store already, I sell the occasional print and so I don’t really have anything to lose by listing it there.
My first wave of sales came from announcing the existence of the book to friends and family on Facebook, followed by mentioning it regularly on Instagram and Youtube. Marketing an item like this is a whole other ball game which entire books could be written about!
Final Thoughts
I hope this post has been useful to some of you! If you have any questions at all then just let me know.
If you want to stay updated with more urban sketching inspiration, tutorials and behind-the-scenes info on my upcoming projects then sign up for my newsletter below!
Comments are closed.