One of the keys to a successful urban sketch is drawing elements in perspective. Perspective is a fundamental skill in drawing in which we can make objects on a 2D surface appear 3D. This makes the results of learning perspective super satisfying.
Most urban sketchers are not slaves to perspective. We are not architectural illustrators for example (although many urban sketchers do come from the field of architecture).
Urban sketchers won’t generally map out their sketch with perspective lines converging at the vanishing points as it takes away from the ‘sketching in the moment’ vibe and perhaps the looser feeling some sketchers want to achieve.
Although there are exceptions to everything, of course. Check out urban sketcher Stephanie Bower – she does usually start with some light perspective lines. Her sketches are usually quite accurate in regards to perspective but guess what – she IS actually an architectural illustrator as well as an urban sketches.
If you really want thorough schooling on perspective then Stephanie Bower is the person to check out. Here are links to her Craftsy courses in which she explains and demonstrates her approach to urban sketching in perspective:
Once you understand the principles of perspective, it can be simple enough to gauge perspective by eye rather than using lots of guidelines. Especially if you prefer to be a bit looser and casual about your sketch. You can also emphasise and exaggerate perspective to make your sketch look a bit more quirky – like Ian Fennelly for example.
Ok, so let’s get into it – let’s take a look at all the terms thrown around when we talk about perspective and get a clearer idea of what they mean.
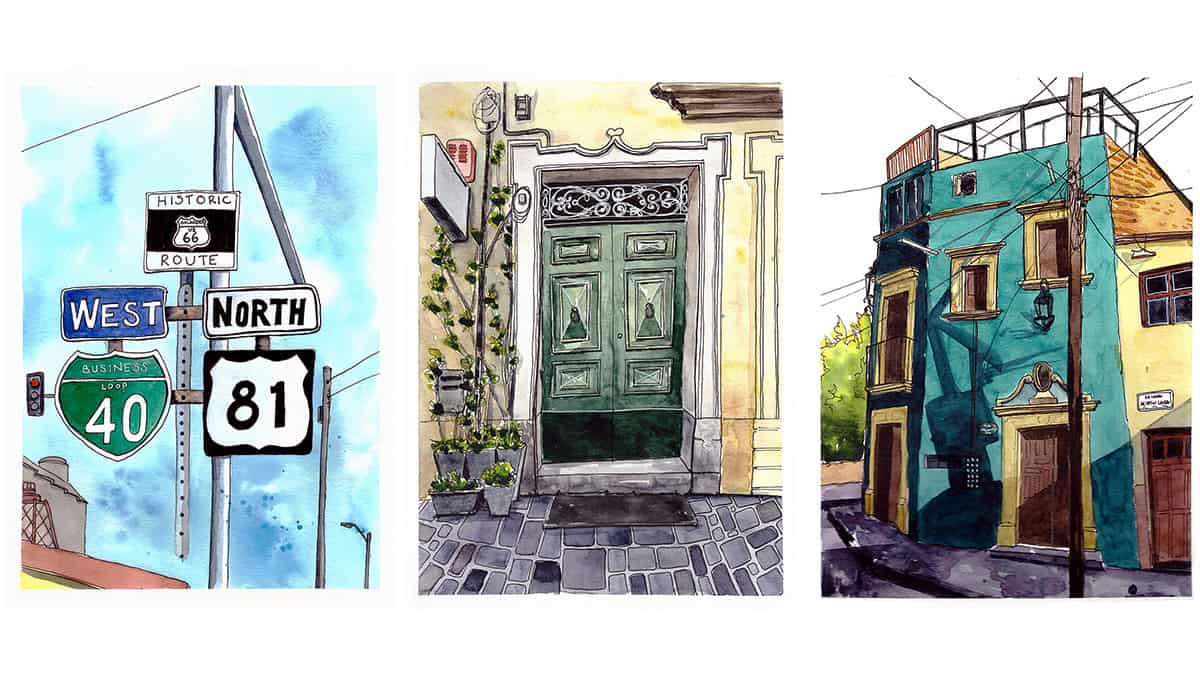
Check out my ebooks with hundreds of ink & watercolour travel sketches from all over the world. Get some inspiration for your next trip…

Types of Perspective
The first distinction to make is between linear perspective and non-linear perspective.
Linear perspective refers to a scene where there are parallel lines that recede off into the distance – to something called a vanishing point located on the horizon line – don’t worry we are going to cover this in more depth later in this post, this is just a high-level explanation for now.
If there is only one vanishing point on the horizon line and all the parallel lines in the scene meet (or ‘converge’) there, then this is known as a one-point perspective. If there are 2 vanishing points on the horizon line, then this is a two-point perspective. Again – I shall show examples of these a bit further on in this post.
Linear perspective is what we usually find in architectural scenes, whether it’s external vies of buildings or interior spaces. There are lots of lines sloping off at various angles to indicate they have depth and are thus 3D.
Non-linear perspective is when there are no lines present that recede off into the distance. This kind of perspective is most common in natural scenes and landscapes. Therefore, non-linear perspective utilises other principles to infer depth, distance and perspective. We shall take a look at this much later in the post – but if you want to jump straight there, then click here.
Linear Perspective
One Point Perspective
One-point perspective is where all the PARALLEL lines of your building (or subject) converge to meet at one point on the horizon, known as the vanishing point.

This sketch by Phil Dean (@shoreditchsketcher) demonstrates the use of one-point perspective beautifully. You can see all of the lines of the buildings on the left converging to one point on the horizon line over on the right of the page.
Here’s another example of a one-point perspective by Alicia Aradillia. You can see that the tops of the skyscrapers also angle downwards to line up with the vanishing point on the horizon:
Two Point Perspective
As the name suggests, this type of perspective features two vanishing points on the horizon line.
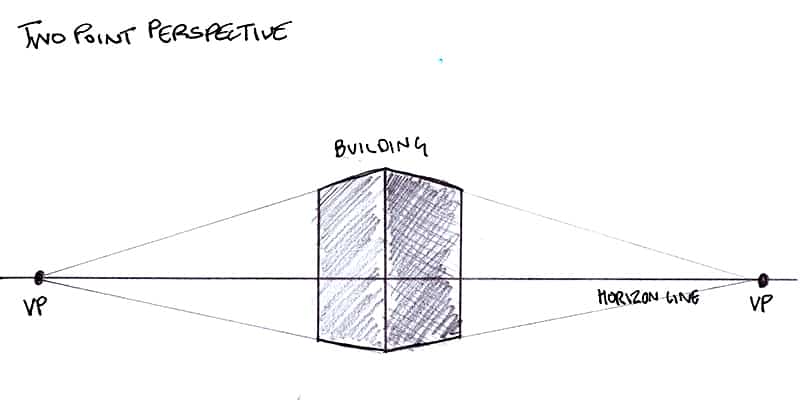
In my sketch below you can see how the corner of the building is prominent in the sketch and we can see down both sides of the building, both have converging lines towards a vanishing point outside of the page.
This is also an example of how you do not need to be dogmatic about perspective to still get a good enough sketch. I did this by eye and while it’s not perfectly accurate, it gives enough of a feeling to make you believe or understand what’s going on.
Some of my favourite online classes
- Urban Sketching: Express Your World in a New Perspective – Lapin
- Travel Illustration: Recreate Your Favourite Place – Alex Green
- Architectural Sketching with Watercolor and Ink – Alex Hillkurtz
- Urban Sketching: Create Expressive Cityscapes – Eleanor Doughty
Three Point Perspective
Three-point perspective is where you have….(you guessed it)….3 vanishing points!! So where is the third one you may ask? Well, it can be up or it can be down!
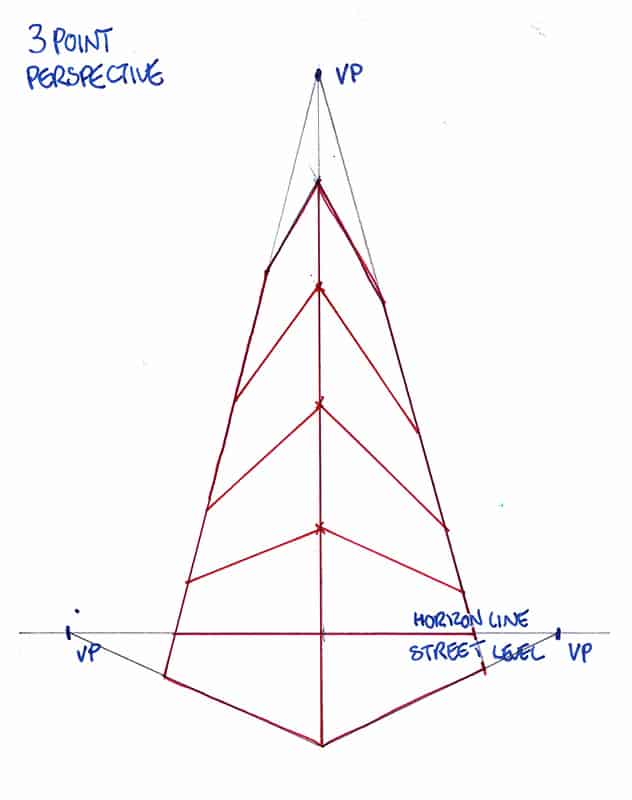
You may have noticed this when you take photos and buildings seem to lean into each other as cameras dramatically exaggerate the perspective. So – if you are looking up and you can see the walls leaning in towards each other – this is known as a “worm’s eye view” – such as in my diagram above and the photo below.

If, for example, you are at the top of a skyscraper looking down and the bottoms of the buildings seem to lean in towards each other – this is known as “birds-eye view”.

So – how do you know which perspective you’re dealing with?
Well – it depends where you stand (or sit)…you may want to position yourself deliberately so that you are drawing a one-point perspective, for example looking down a street or path where all the lines meet at one point on the horizon line.
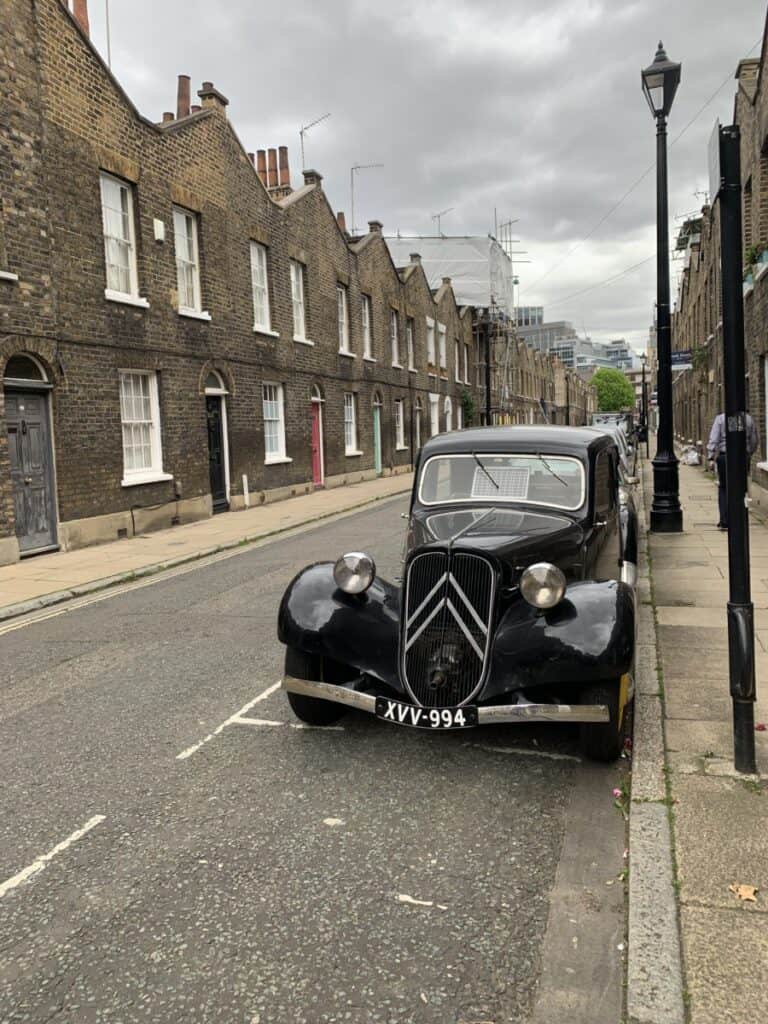
I took the photo above a while ago in London. This is a good example of a one-point perspective where all of the parallel lines in the photo seem to be sucked into a black hole in the distance, ha ha.
I was mainly intrigued by the gorgeous vintage car juxtaposed by the grim terraced housing and stormy sky – that’s why I took the photo – but it works well as an example of a one-point perspective.
But you may position yourself on the corner of a building where you can see both sides of the building and that each side vanishes off to 2 different points on the horizon such as the photo below.

You can always practice perspective quite deliberately using photos:
- Find examples of 1 and 2 perspective scenes.
- Print them out if you can
- Get a ruler and a marker and follow the top and bottom edges of the buildings. The place where they all meet will tell you (a) where the vanishing point is but also (b) it shows you where the horizon line is too – which is a flat horizontal line.
The horizon line is also known as the eye line, so if you are sitting down your eye line will be lower and therefore the perspective shifts a little.
This all takes practice – I think it’s all well and good talking about it in theory but perspective is just one of those things you keep practising with each sketch.
If it’s something you really want to focus on then I encourage you to lightly draw the horizon line on your page and light construction lines in order for you to get your perspective more accurate.
BUT – I also give you permission NOT to do that – and just eyeball it.
Also – sometimes your vanishing points could be WAAAAAAY of your page, so knowing how to draw linear perspective without horizon lines or vanishing points is a very useful skill.
How to Draw Linear Perspective Without Vanishing Points
A lot of “eyeballing” perspective well is to do with getting angles right. Someone explained to me that using clock hands as a reference helps them to see angles better, I.e. think of the angle in terms of where it would point on a clock face. Does it slope down towards the left, is it pointing at the 7? Or maybe it’s not quite so sloped and it pointing at the 8….or perhaps it’s pretty horizontal so it’s pointing just below where the 9 is on a clock. I like this analogy.
I generally just get a pencil so it’s flat and then tilt it to the same angle I want to mirror and then roughly apply that to my page. That’s as complicated as I get!
But as long as I am somewhat correct I don’t mind – I am less concerned with complete accuracy than when I was a beginner – I think because I know (after a lot of experience) that even if it’s not quite correct it doesn’t matter as it can add a sense of character and quirkiness to a sketch.
Want to learn travel sketching in ink & watercolour?
Check out my course, Sketch Your Adventures and for a limited time get 50% OFF!!!
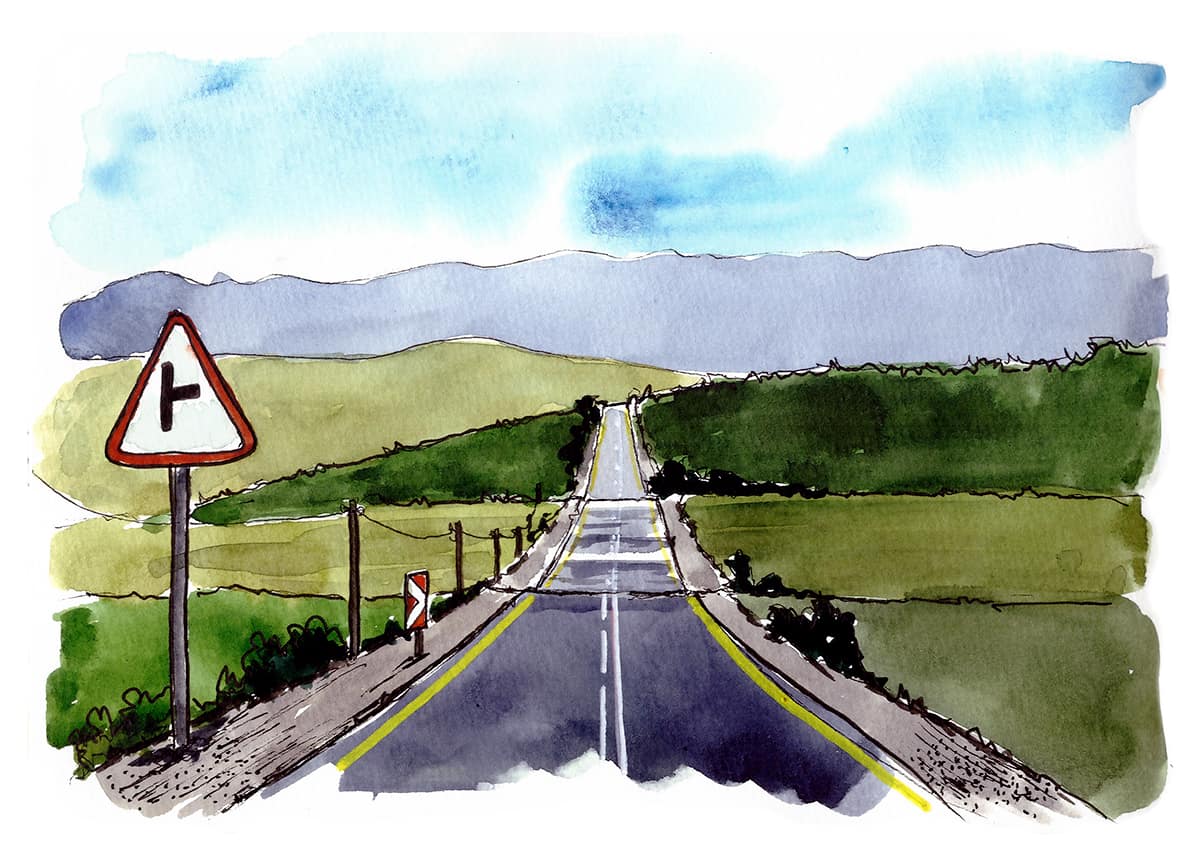
Non-Linear Perspective
We don’t often hear the term zero-point perspective but it’s quite common. It refers to a scene where there are no parallel lines receding off to vanishing points on the horizon.
Think of a natural scene such as a landscape. Check out the photo below – see how there are no parallel lines involved?

To infer perspective in a non-linear scene (I.e. one with no parallel lines receding into the distance) we must use some other tricks.
You can use relative scale to show perspective – this is when objects that are further away from the viewer appear much smaller than those in the foreground (and closer to the viewer).
Overlapping is another useful technique to show distance. Check out the photo below of a mountain range – do you see how the mountains overlap, showing us the ones behind are further away.

Using the same photo, can you see how value and colour are important factors telling our eyes that something is further away. Objects that are further in the distance tend to have more of a blue tint. This is because of the effects of the atmosphere. This is most obvious when looking at distant mountains.
The principle of clarity is another useful technique – objects in the foreground are much clearer and have more detail whereas objects in the distance should be less detailed and clear.
This follows on to texture – again the closer an object is the more texture (and again, detail) you will see.
You can use tricks such as drawing objects that are in the foreground with a thicker line, and objects in the background with a finer line – it’s a lot of fun to play with this and exaggerate it to make a stylised sketch.
The position of objects help to show perspective – if an object is placed higher on a flat surface it tends to recede away from the viewer. This is also dependent on some of the other factors mentioned above – such as relative size, clarity and texture.
If you would like more information on the art supplies I use and recommend, head over to my Recommended Stuff page. In addition to art supplies I share my favourite books and courses too!
Final Thoughts
Phew – that was a lot of information – but I think we covered all of the bases to start with. I did not go further than 3 point perspective in this article, but you can – there’s 4 point perspective where we get into the territory of Lapin and Paul Heaston. There’s also 5 point perspective which is a fish-eye effect. But unless you purposefully wish to pursue these styles then the above information should give you everything you need without confusing you.
Thanks for reading this far, do check out more posts on the website and don’t forget to sign up for my newsletter to hear more from me, including weekly videos released over on the Youtube channel.