Since I started urban sketching, a growing interest of mine has been how to learn to let go and to sketch more loosely. I think my natural inclination is to try and draw as perfectly as I can and to capture lots of details as best I can. Whilst I am absolutely NOT a realistic sketcher I feel my sketching style is too tight and I can’t quite achieve that effortless sketchy quality I would love to develop.
I have put this post together gathering all of my research and personal learning as to how to obtain a loose sketching style for my own benefit but also to help anyone else who is facing this challenge in their own sketching practice.
I’m still not there yet but if I have the information on how to approach loose sketching, then that’s half the battle! I hope the advice below helps you to loosen up too.
What Does “Loose Sketching” or Drawing Loosely Mean?
Drawing or sketching loosely means drawing in a more relaxed and comfortable style, which in itself shows confidence in the drawing. The idea of sketching loosely is to not worry about the details but to capture the “bigger picture” and the essence of your subject.
A loose sketch or drawing looks natural and effortless. In my opinion, a looser sketch can capture the atmosphere at the time of the sketch, and I think this is an important quality for urban sketchers to learn as urban sketching is all about capturing the things you see in the world, right in front of you at that moment in time.
Why is Loose Sketching Important?
It’s important to learn to loosen up and let go of the details. Learning to sketch loosely means you can get quicker at getting your subject down on to paper. This is super useful for urban sketching when you may have a limited window of time as you are with family or friends, or about to meet people, or perhaps the weather is against you and it could start raining at any moment. Perhaps you are waiting for the bus to work but you absolutely have to sketch the scene in front of you.
Loose sketching can help you capture something at a moments notice. As well as helping with speed, learning to sketch loosely will help to develop your observation skills. In trying to capture the essence of a scene quickly you will learn which elements can be left out and which are the essential lines that tell the story.
Sketching loosely is not all about speed, in fact sometimes slowing down may help achieve a looser feel. Sketching loosely could be better described as capturing a scene or object with as few details as possible, yet still remaining readable to the viewer. To capture fewer details we must decide what is and is not important in the sketch, which details we can sacrifice and how we can use less pen or brush strokes to describe what we want to say.
Sketching loosely will encourage you to play a bit more, which means your sketches will naturally become more organic and vibrant.
Sketching is about capturing the essence of something. If you agonise over each line, trying to capture each detail then your sketch will appear tight and too controlled. It will look like you were battling with the subject in front of you, trying to represent it actually as it is on your piece of paper.
But why do we want to do this?
If we wanted a replica of the thing in front is us, we would take a photograph. Imperfections are what make our sketches visually more interesting. As an artist, you want to capture the spirit of the subject the way you see it, or the way you interpret it, and that, in turn, is much more exciting to an audience.
Want to learn travel sketching in ink & watercolour?
Check out my course, Sketch Your Adventures and for a limited time get 50% OFF!!!
How to Approach an Urban Sketch Loosely
Some urban sketchers sketch with a pencil first to get the basic shapes, proportions and perspective on the page before moving on to drawing in the details with a pen, and then later paint the sketch with watercolours.
Other urban sketchers like the immediacy of just drawing what they see directly onto the page with a pen. They may make a few slight dots here and there to mark the height of the tallest building, or where a certain edge should stop to make sure everything fits in. You can see urban sketcher Lori Sokoluk do this at the beginning of the video below:
Other urban sketchers may draw some faint pencil lines and move straight to watercolour paint, and then add a few lines in pen over the top of that (or not).
And yet other very confident urban sketchers may just go straight in with watercolour and no lines at all – I’m thinking of Marc Taro Holmes and Liz Steel!
There are many ways to slice the sketchy pie so to speak.
As such I have broken down how to approach loose sketching in three different mediums: pencil, ink and watercolour. I think these are the three mediums which most urban sketchers use, so that’s what we shall focus one here.
If I can just interrupt this article very briefly (I do apologise)…I have some exciting news…
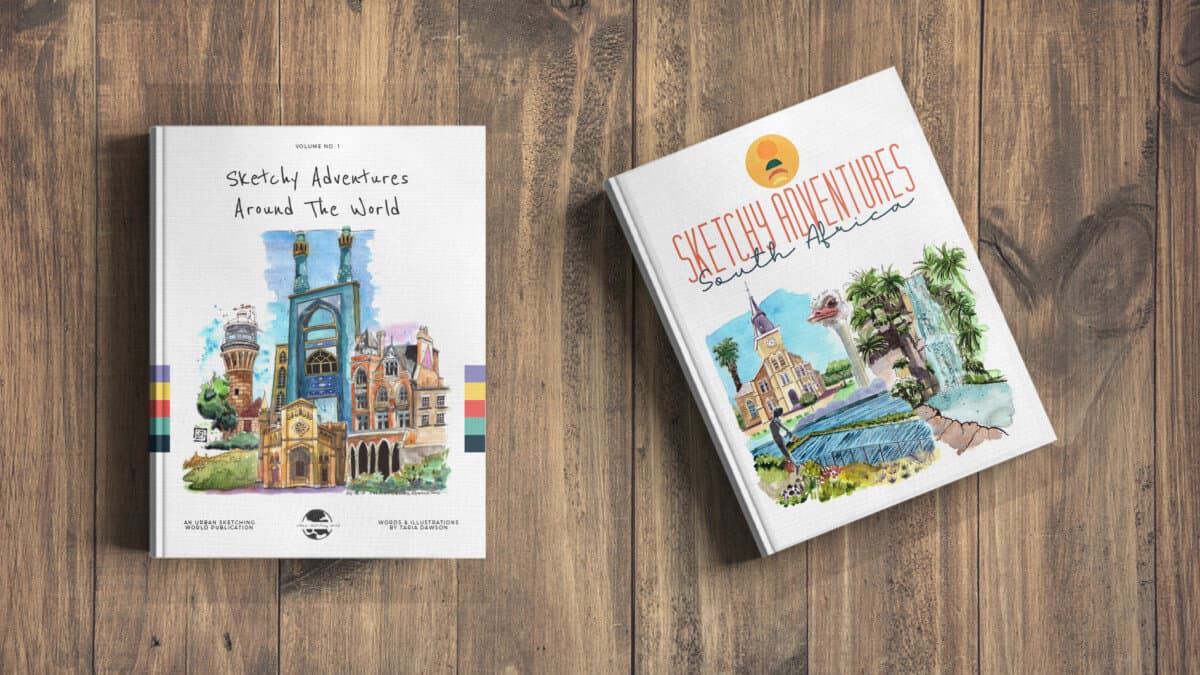
Check out my ebooks with hundreds of ink & watercolour travel sketches from all over the world. Get some inspiration for your next trip…
Sorry about that interruption….now, on with the post….
Pencil Sketching
The aim of the game here is to practice. Loose sketching is a technique and therefore a muscle that requires regular exercise. For any practice or exercise I find I need to use scrap or cheap paper, this loosens me up psychologically as I don’t feel I’m wasting my precious watercolour sketchbook space. It may sound obvious but go dig out the cheap sketchpad in your drawer of abandoned art supplies to get started.
Start drawing basic shapes. A circle is good to start with. Keep drawing the circular shape. Sketch with your whole arm but keep your arm loose. Draw very lightly but keep restating the lines and refining the shape on each pass of the circle. Don’t erase your old lines!
Don’t be afraid to show how you found your way in a drawing. This shows authenticity.
Now try a square and turn the square into a cube. Let your lines go past the point where they should meet. Keep refining the shape with more lines, again draw very lightly. Use a softer pencil like a ‘B’. Focus on how the motion of your body, especially your hand and arm affect the quality of your lines.
Learning to rough out a sketch in very light loose pencil lines is the goal. Once you think you have the hang of the basic shapes, progress onto a more complex object, and then onto a scene.
If you are learning to sketch loosely with a pencil to rough out a sketch that you intend to paint with watercolour you may wish to erase some of your sketchy lines, especially if there are many of them.
Once you have found the correct lines that have made the most pleasing shape, you can make the line you want to keep a little bolder than the rest and the gently erase the very light lines. I emphasise the gentle erasing, you do not want to damage the surface of your paper before moving on to watercolour.
Pen & Ink Sketching
Sketching loosely with a pen is a little different to using a pencil. Continually restating the line would probably make a mess. I think practising the exercises in pencil above are a good lead into loose sketching with a pen.
Fountain Pens
My favourite way to achieve a loose pen sketch is to use a fountain pen. Just the feel of a fountain pen in my hand makes me psychologically loosen up, I really don’t know why. Perhaps because I know I cannot quite control the quality of the line?
This is especially true if you are using a fountain pen with a fude nib. A fude nib looks as though the nib has been bent to a 90-degree angle. By altering the angle at which you draw you can achieve a thinner or thicker line.
A favourite and relatively inexpensive fude nib fountain pen I see many urban sketchers use is the green Sailor Fude pen (picture below – I bought mine from Amazon).
The primary fountain pen I use is a Lamy Safari with an ‘EF’ (extra fine) nib. Again, I bought mine from Amazon. A lot of stores seem to stock Lamy Safari fountain pens but always with the Medium nib, Amazon was the only place I could find an Extra Fine nib which, as the name suggests, produces a finer line than the Medium (or Fine) nib.
The Lamy Safari is also a very well-loved fountain pen amongst urban sketchers. I am not sure I know why as I have not sketched with an extensive amount of fountain pens to be able to give an informed decision. Perhaps because again its reasonably inexpensive and if you buy a converter (again, from Amazon) you can fill it with permanent ink, which is more economical over time than using cartridges and you can choose which ink you want to fill your pen with.
I use black Platinum Carbon Ink which is waterproof when dry, perfect for applying watercolours over the top. Again, it is a popular ink choice with other urban sketchers too.
For further information about sketching with a fountain pen check out my post here. To see my new fountain pens I just received while in South Africa, check out my video below where I inbox them, show you how I fill them from the ink bottle and demonstrate their line widths:
Fineliner Pens
I also use fineliners such as microns, uni pins or copics to draw with. They are used for technical drawings as well as by sketchers. They produce a very consistent line, and to change the thickness of the line you produce you to have to switch pens. I suppose this is why I found sketching loosely with them, however, I feel this is a state of mind and something that can be surpassed.
I am at the point in my own sketching journey where I can rough in sketches lightly and loosely with pencil and then the refinement comes with the pen lines, but I still do not slave over the details. I have just found ways to express details in shorthand. This helps with my sketching speed too.
Some of my favourite online classes
- Illustrating Nature: A Creative Exploration – Laura McKendry
- Acrylic Painting Step by Step: Create Incredible Landscapes – Maru Godas
- Daily Sketching for Creative Inspiration – Sorie Kim
- Urban Sketching: Capture You City in Motion – Inma Serrano
Techniques & Exercises
A favourite technique of sketchers is to try a technique called ‘continuous line drawing’. The essence of the exercise is to draw without lifting your pen from the paper. Once you touch pen to paper, it cannot leave until you have finished your drawing. Try to draw at the same time as observing your subject, this will help with accuracy.
Continuous line drawing is a useful technique to help with hand-eye coordination and observation skills. The exercise also helps to develop a sense for what the important lines are to capture the essence of your subject, which is one of the goals of sketching loosely mentioned above.
Continuous line drawing can become a finished piece of art in its own right:
Note: the results of the continuous line drawing are not going to be pretty, at first. Bear with it though, focus on this as an exercise, like practising your music scales.
Continuous line drawing will certainly make you sketch in a different way, and that’s the point of practising techniques and working through exercises, we need to break down our barriers, get out of the comfort zone and push through personal boundaries to take sketching to a new level. It is the only way we can improve.
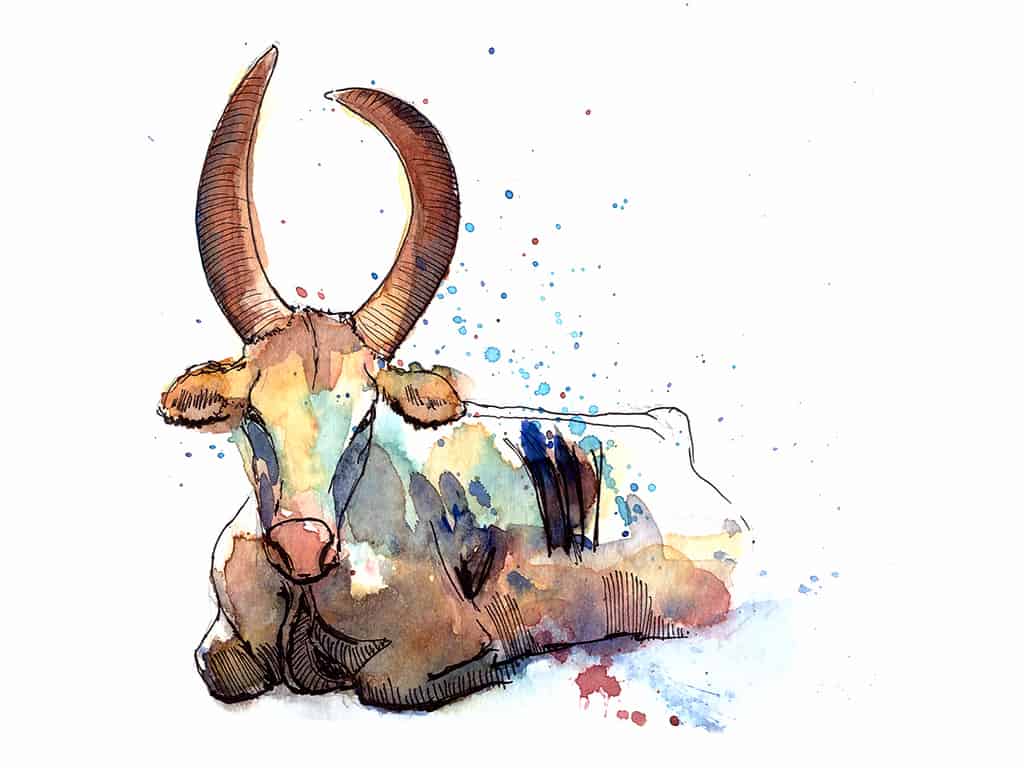
A technique or style of urban sketching I am a big fan of is using very loose pen lines and minimal splashes of watercolour in key areas to enhance the sketch, drawing attention to key areas.
As I am writing this I am thinking of Simone Ridyard, architect, senior lecturer and founder of Urban Sketchers Manchester. She epitomises this style to me and I love every single sketch or illustration of hers that I see.
You can instantly tell it’s Simone’s sketch. Incidentally, she has a book called Archisketcher (which you can find here at Amazon) in which she teaches her approach to sketching architecture and cityscapes, as well as demonstrating how different artists interpret the same building or scene, such a Notre Dame and the Brooklyn Bridge.
I just discovered copies of Simone’s sketchbooks, containing scenes of Manchester, are available to purchase directly from her website – I shall be purchasing one of these (if not both) very soon!
Side note: I love collecting sketchbooks published by urban sketchers – they feed my soul!
Koosje from Sketchbook Skool has a handy video on how to get started with this sort of approach:
Watercolour Sketching
There are a number of ways to practice sketching loosely directly in watercolours. I think painting immediately with watercolour is such a useful skill to have. The nature of painting shapes loosely first in watercolour and then, for example, going in with a pen to sketch some details achieves a lovely effortless feel.
I find it hard to be very precise with watercolours, and this is the joy of them, the paint has a mind of its own! Obviously there are watercolour artists out there who paint very precise realistic paintings, using very small brushes to capture minute details. That’s definitely the opposite of what we are trying to achieve here.
This leads me to some suggestions:
- Use a large paintbrush, this makes it very difficult to get bogged down in details.
- Treat your brush like a pencil, to sketch loosely hold the brush towards the end of the handle.
For an in-depth look at painting loosely with watercolour, check out Eric Yi Lin’s video below. While not focussing on urban sketching, this video is still super useful in bringing clarity to exactly what we mean by a loose painting. I am in no doubt this video will help you to develop a loose technique to apply to your urban sketching, I learned so much from watching it.
How to Sketch Directly with Watercolour
- Start by using a very pale colour that won’t show through too much when you start building the layers later
- Get the rough shapes in and focus on proportions i.e. the relationships between the objects you are painting
- Squint in order to focus on the larger shapes and block out the finer details
- Get the major shapes down on paper before progressing to any sort of details
- Focus on quick sketching with the brush
- Then add the deepest shadows. Paint the shadows as shapes, don’t be afraid to merge the shadow shapes together. Focus on what you are actually seeing, not what you think the object looks like.
- From this point, you can paint in the actual colours you see (or the colours you want to use in your sketch). Don’t block the colours in, just use light suggestions.
- Add further layers and contrast until you are happy with the depth of the sketch
- If you want, you can go in with pen afterwards if you wish to add some lines or details.
Other Loose Watercolour Techniques to Try
Another method to keep things loose is to paint some random splashes of watercolour to use as the background and sketch over the top. I talk about this technique in my post on how to improve your urban sketching immediately.
Using wet in wet technique is a fantastic way to get a nice loose feel to a sketch. It’s a very spontaneous way to sketch, as you never quite know what the result of the paint mixing on the page will be. In this video by Winsor & Newton, they demonstrate how paint behaves on wet paper, how it mixes and also how pigments can separate. It’s a quick interesting look at the technicalities of how paint behaves using this method.
As mentioned above, you do not necessarily have to paint every inch of the sketch. Leave some negative space, finish before you think the sketch is finished. The observer will fill in the gaps and this will help to achieve a loose sketchy feeling.
To sum up, I’ll leave you with a one minute video from Marc Taro Holmes showing an exercise in super fast loose sketching, using continuous line drawing and the use of loose watercolour painting to “tint” his ketch as he calls it:
Whew! We have covered a lot in this post. I hope some of these suggestions help with your journey to loosening up your sketching.
I love to connect with other urban sketchers so please come say hello on Instagram @urbansketchingworld and consider joining my newsletter below. Every couple of weeks I will share with you the best urban sketching stuff from around the globe!