It’s an issue that comes up time and again. How to find time for urban sketching (which I have a specific post on here) and how to get quicker at sketching. Many people don’t have 2-3 hours on a regular basis to commit to urban sketching. And if they do, they want to achieve more than one sketch.
I have somewhat made my peace with the fact I am a slow sketcher and that one sketch will take me 2 hours.
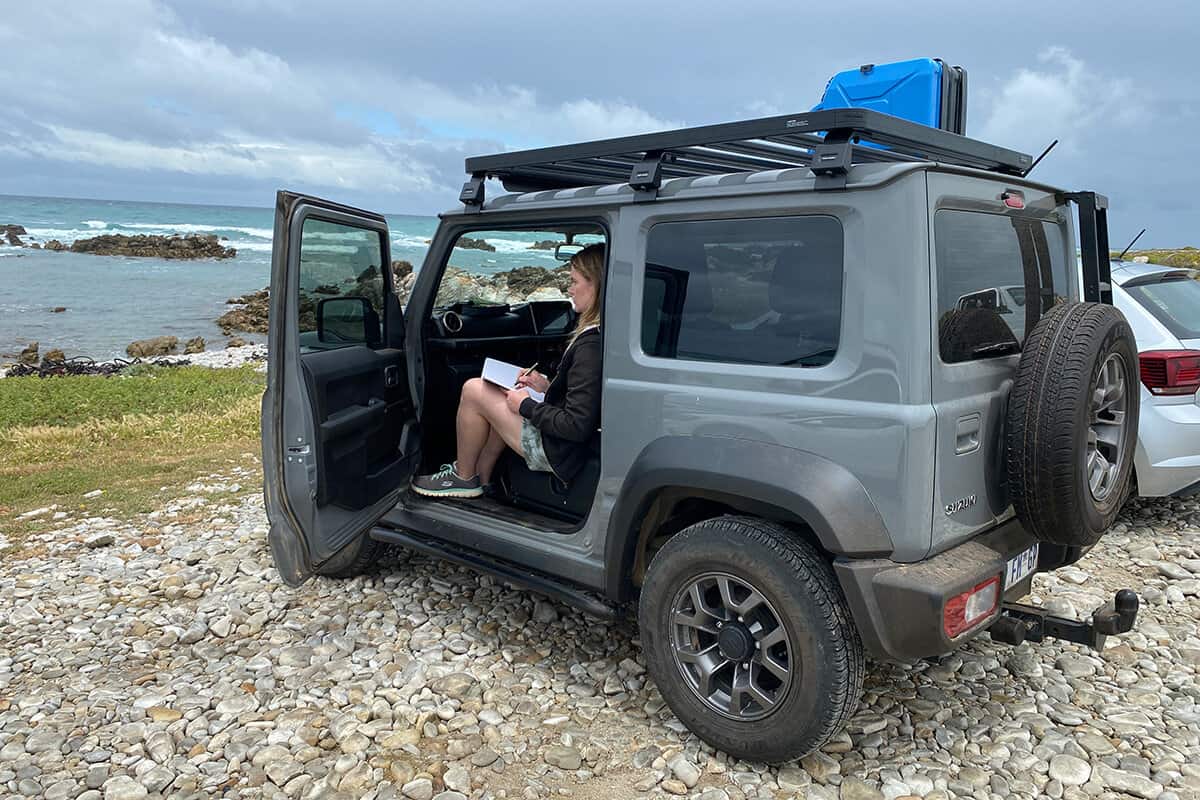
However, there are scenarios where I am travelling and I am with other non-sketchers yet I want to sketch as much as possible and I don’t have hours and hours to spend.
I have found the following strategies have helped me sketch quicker and capture more when time is of the essence.
How to get faster at urban sketching
The first thing we need to talk about is expectations and managing them. You simply cannot produce what you can in 2-3 hours in the space of 30 minutes. It’s just not possible. Simply speeding up your tempo of sketching is not going to help, it’s not what the issue is. It has taken me a long time to understand this.
Certain styles lend themselves to speed. Quickly painting blocks of watercolour and adding a bit of line work over the top is ALWAYS going to be quicker than a carefully rendered architectural drawing.
Just a quick interruption – if you would like a structured course that guides you step by step to sketching quirky ink and watercolour scenes then my course Sketch Your Adventures will be right up your alley.
If you would like to chat and ask questions then just drop me a line taria@urbansketchingworld.com – my passion is to encourage everyone to start their own sketchy adventure and then help guide you along it any way I can.
Strategies for Faster Urban Sketching
Overview
Here’s a summary of the strategies we are going to look at in this post.
- Draw on site and paint later.
- You don’t have to draw everything.
- Loose contours drawings
- Sketch directly in watercolour and add some defining lines over the top in ink or watercolour pencil
- Negative space
- Bonus strategy…read to the end to see!
Draw on site and paint later
Urban sketcher John Harrison draws everything on location, however, he told me in this interview I did with him, that he adds his watercolour later at home.
This makes sense having seen John’s work (check out his Instagram here). He has a very distinctive way of painting. I think this is a great strategy. It means John only has to carry his sketchbook and pen when he goes out to sketch the Yorkshire landscapes he is surrounded by.
Phil Dean (a.k.a Shoreditch Sketcher) is another urban sketcher who often uses this strategy. He tends to draw on location and then adds colour with alcohol markers later. Again, this makes sense rather than carting a whole bunch of markers around with you at all times. This could become a little cumbersome.
By the way, Phil has two books on the matter of urban sketching, one called Urban Drawing (which you can find here) and the latest one (which will be released in the UK in Autumn 2022 and the US in March 2023) is called Urban Watercolour (you can find it here).
Some urban sketchers are very strict about their sketches – what they do on location is what they do and that’s how the sketch stays. That’s fine but that’s their personal rule. Don’t let this put you off doing whatever is most comfortable for you.
If you would prefer to draw on location and then add colour later from either a photo, your memory or even your imagination, then do that.
You don’t have to draw everything
If you want to sketch quicker, forget drawing the entire scene in front of you. What’s most interesting to you? Are you sat in front of a cool building? What makes it interesting to you? Is it one particular section? Just draw that. Forget the rest of the building.
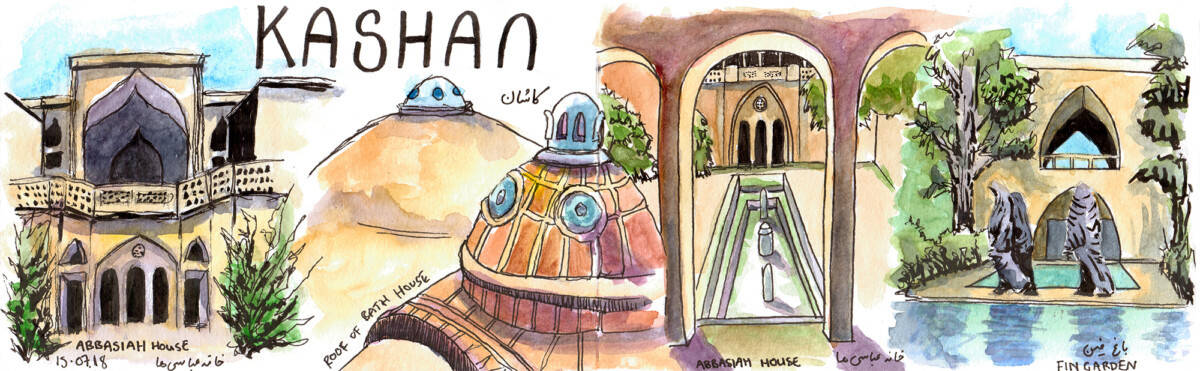
You can even montage smaller sketches like this across a sketchbook page. This was my predominant strategy for sketching in Iran when I was on a schedule and travelling with 3 other non-sketchers.
You can see in the sketch below there are actually 4 different small sketches of various parts of the city of Kashan. This helped me capture multiple views of the city in quick small sketches. We were only there for one day. This seemed to be the most efficient way to sketch as much as possible!
For more information on designing a sketchbook spread, you can check out this post. And then come and join me on Patreon where I have an entire month’s worth of demonstrations on the subject matter of sketchbook spreads.
Reportage illustrators, like George Butler, Lucinda Rogers, Veronica Lawler, Jedidiah Dore to name but a few, only have a window of time to capture the “story” they are reporting on.
George Butler is a conflict artist. He has to work in adverse conditions while drawing. He does not have time to draw everything. He must choose the focus of the drawing in order to report the essence of the story. On a side note, I believe he draws on site and then adds colour later (this refers back to strategy number one we covered above).
If you would like to find out more about the subject of reportage illustration, I have a post here with a bit of an overview. If you’d like to go a little deeper, I highly recommend the book Reportage Illustration: Visual Journalism by Gary Embury and Mario Minichiello which you can find here.
Check out my ebooks with hundreds of ink & watercolour travel sketches from all over the world. Get some inspiration for your next trip…
Loose contour and continuous line drawing
Keeping things loose and expressive is a great strategy for sketching quickly. This style of sketching looks easier than it is. I find it difficult to be loose and still keep things looking “good”. It’s quite the skill.
Inma Serrano often uses a continuous line to describe parts of a scene she is sketching.
Suhita Shirodker sketches wonderfully loose people within the scenes she sketches.
I’ve found a lot of sketchers who favour a continuous line approach like a fude nib fountain pen such as the Sailor (which you can find here). I think the variation of line width the pen provides helps with the spontaneous feeling of the overall sketch.
Do you want to learn how to sketch your own adventures in ink & watercolour?
GET 50% OFF FOR A LIMITED TIME ONLY!!
I will show you my exact sketching process in ink and watercolour. I have travelled around the world in the last 3 years and this is my go-to system of creating beautiful yet quirky illustrations to capture the magic of my discoveries.
We will work through 3 projects, step by step (pictured below), all of which are real-life examples of things I have sketched along my travels. I provide the photo references you can work from.
We will start by choosing a composition, laying in the initial pencil sketch, adding ink lines, layering watercolour and adding the final touches.
This and much more are included in my course, Sketch Your Adventures, click the button under the image to find out more!
There’s certainly an art to this type of sketching and it’s not always to everyone’s taste perhaps but I LOVE it. I just need to practice some more. I think a mindset shift is required as well as developing the skill. The need to control and draw things as exactly as possible is a difficult beast to quell!
Direct watercolour sketching
This method of sketching may seem a little intimidating. Marc Taro Holmes and Uma Kelkar have popularised this technique amongst urban sketchers through their 30×30 Direct Watercolour challenge which they hold each year. Marc also has a book specifically on direct watercolour which you can find here.
While Marc’s technique focuses on sketching in watercolour only, with no underdrawing or drawing on top, I’m a fan of starting with loose watercolour shapes and then refining them. by drawing on top. I still think this can be a method of speeding your sketching up. Sure, you have to wait for your initial watercolour layer to dry but that’s a matter of a few minutes. I have a few videos showing this method, the most recent is below:
Sketching in this way can automatically help you loosen up as there are already some imprecise marks down on the page. Sketching loosely on top just seems less intimidating as a result. You can go as far as you want with your sketch on top.
Some of my favourite online classes
- Watercolor Portrait Sketchbook – Carlos Rodriguez Casado
- Expressive Architectural Sketching with Colored Markers – Albert Kiefer
- Experimental Watercolour Techniques For Beginners – Ana Santos
- Urban Sketching: Express Your World in a New Perspective – Lapin
Negative space / white space
In some ways, this is a bit of an extension of the “you don’t have to draw everything” strategy mentioned earlier in this post. However, I do believe this is a slightly different strategy.
You can draw an entire scene but incorporate clever use of negative or white space so that you don’t actually draw everything yet the scene looks complete.
In my personal opinion, one of the masters of this technique is Lis Watkins:
Do you see how she has left the ground blank, save for a few outlines of cobblestones, yet it doesn’t seem blank? It’s as descriptive as the parts of the scene that are drawn or painted.
You will notice a lot of white space in George Butler’s work (who we mentioned earlier) as well as John Harrison who I mentioned in strategy number one.
Selective colour
This is also part of the “leaving white space” concept but I quickly just wanted to give some examples. In fact, a lot of these strategies overlap.
Let’s look at Neil Whitehead’s style – he uses a combination of loose continuous line drawing combined with selective colour. He only paints part of the scene. Notice how he doesn’t “colour anything in” (for lack of a better term). He just provides a loose splash of colour. It’s so expressive and looks deceptively simple but if you check out this video of me trying Neil’s style out, you’ll see quite how tricky it is to pull this kind of thing off…successfully.
John Harrison, who I mentioned in strategy one, also uses “selective colour”.
Bonus strategy: Get a smaller sketchbook!
Ok, this one is a bit tongue in cheek…but there is a pragmatic nugget of wisdom behind it.
Smaller sketchbook = smaller sketches = quicker to do?
Check out this post for more ideas on how to fit urban sketching into your life.